On this page:
Skull Prep
Caping
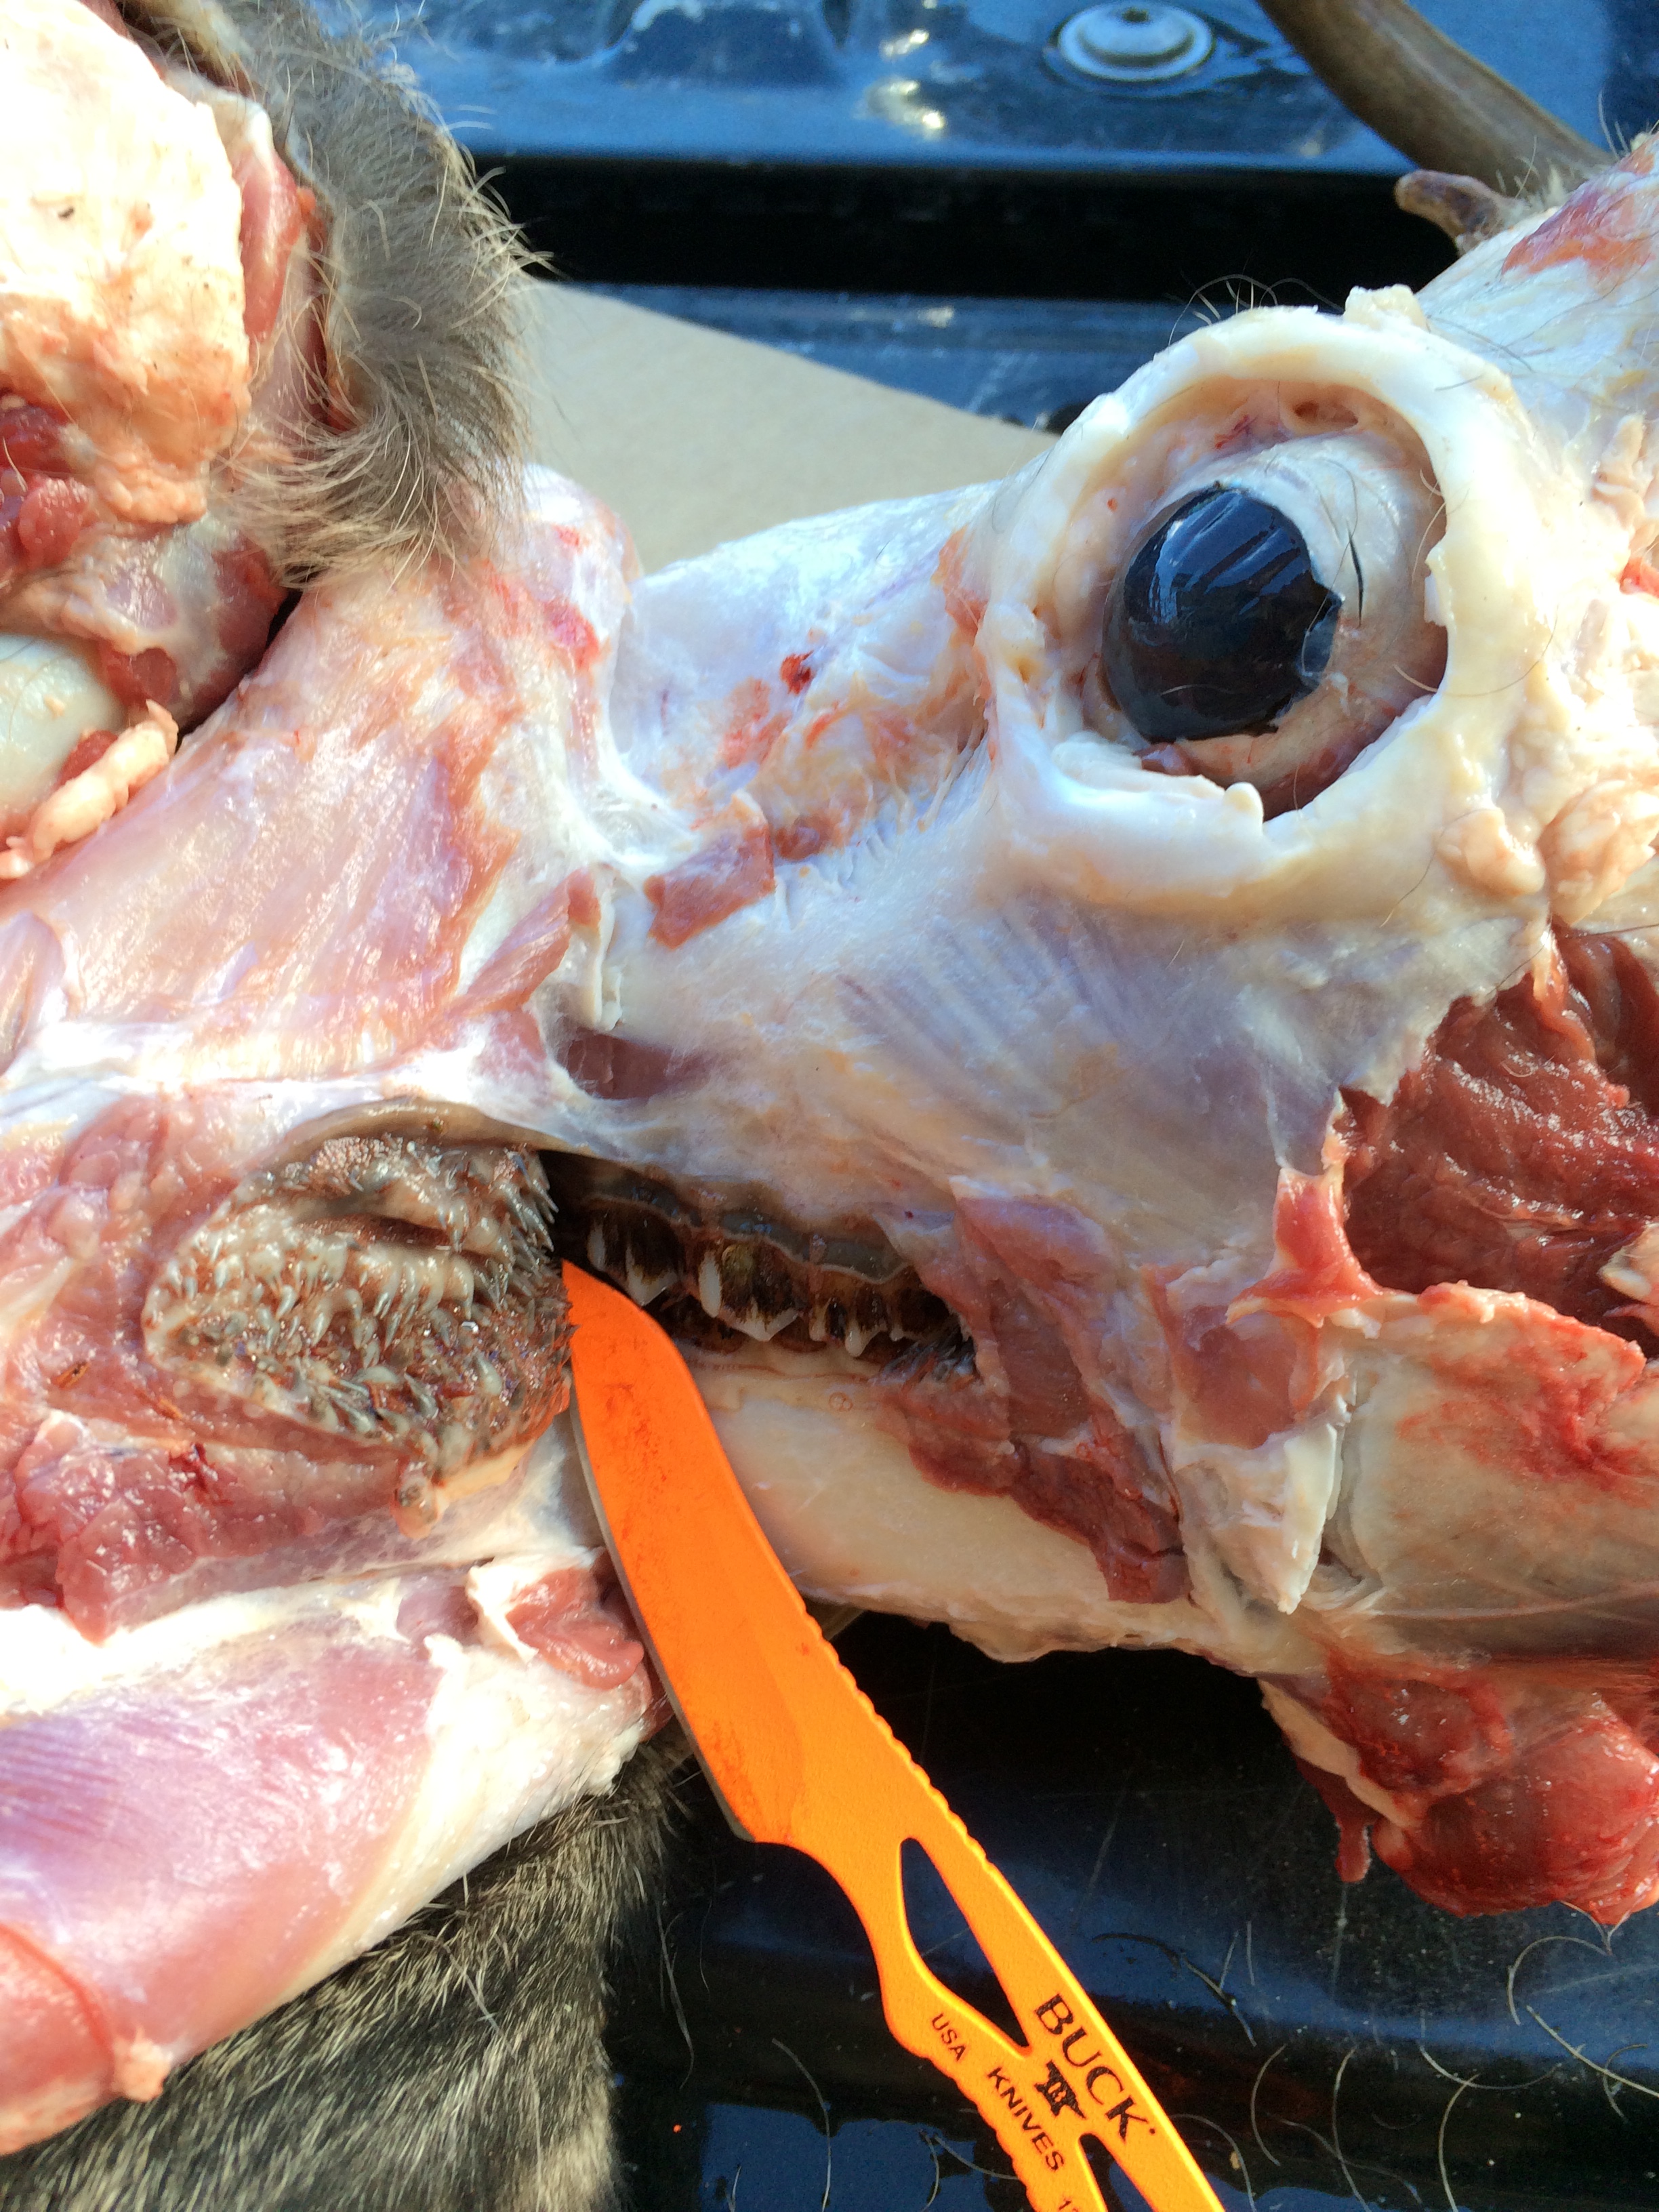
Ear Bone Removal
Removing Pronghorn Sheaths (Horns)
Drilling Out Pronghorn Cores
Pressure Spraying / Power Washing
Mobile Device menu for method-specific cleaning pages:
MACERATION PAGE
SIMMERING PAGE
DERMESTID BEETLE PAGE
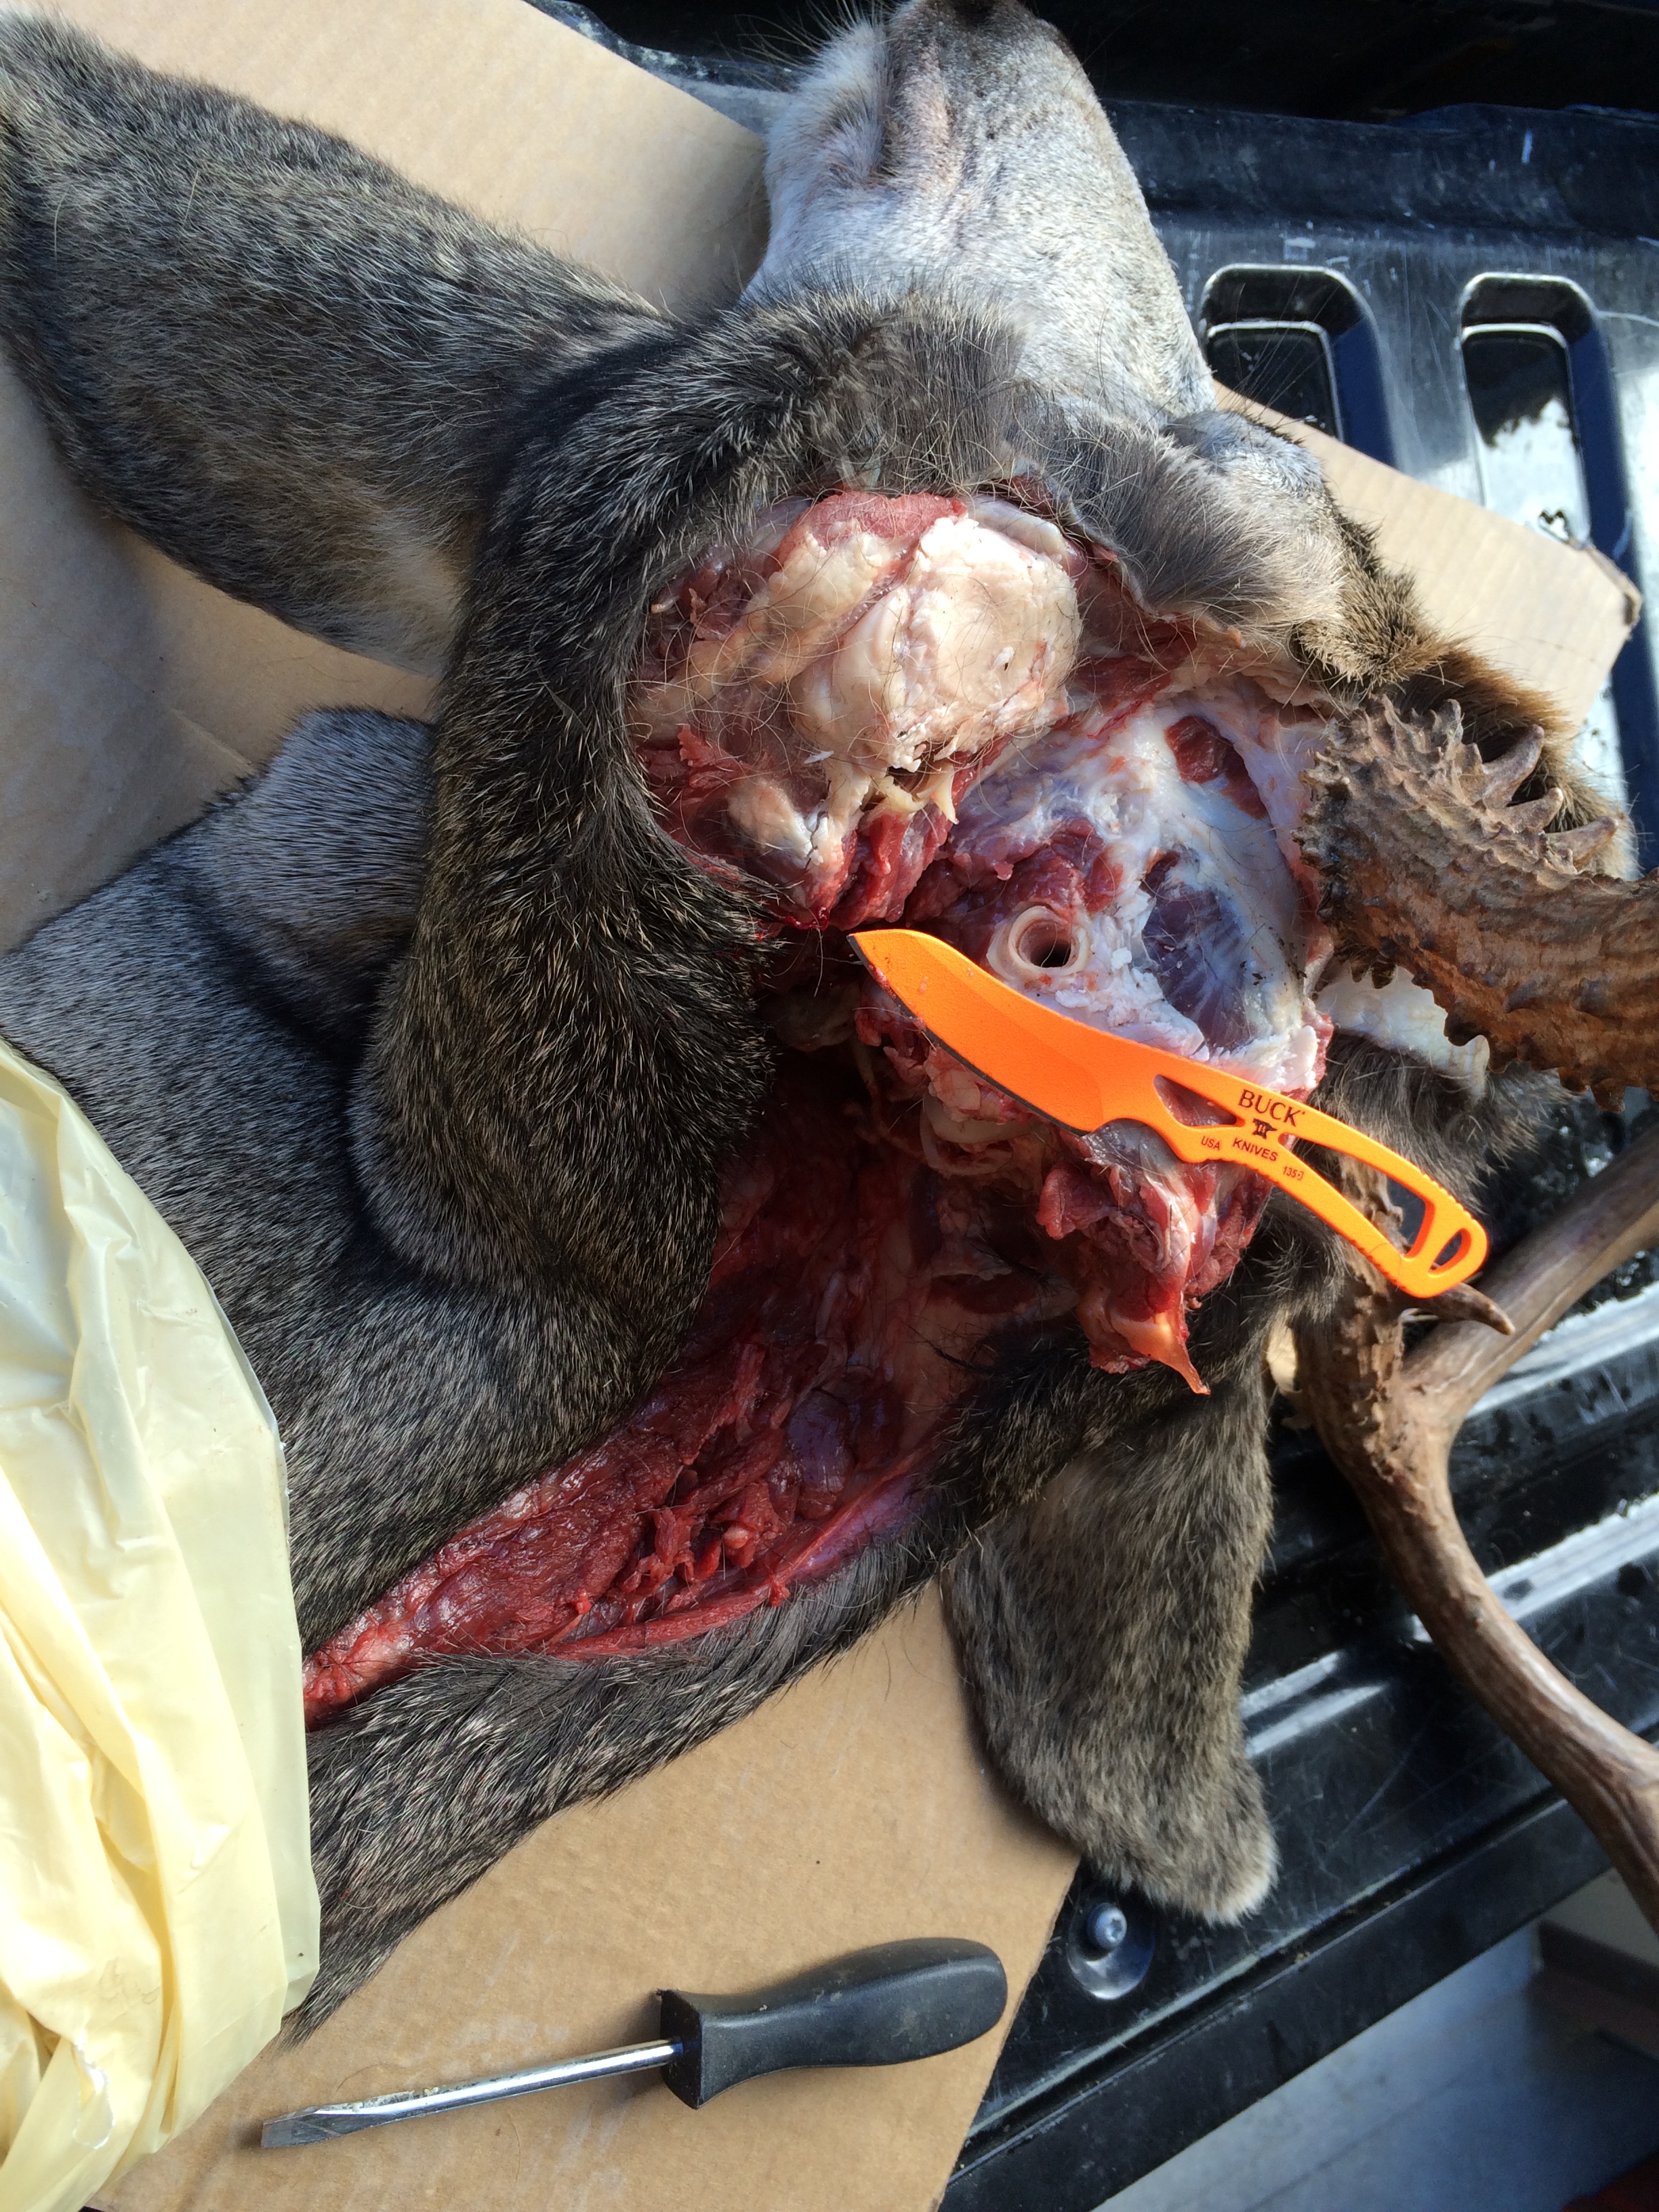
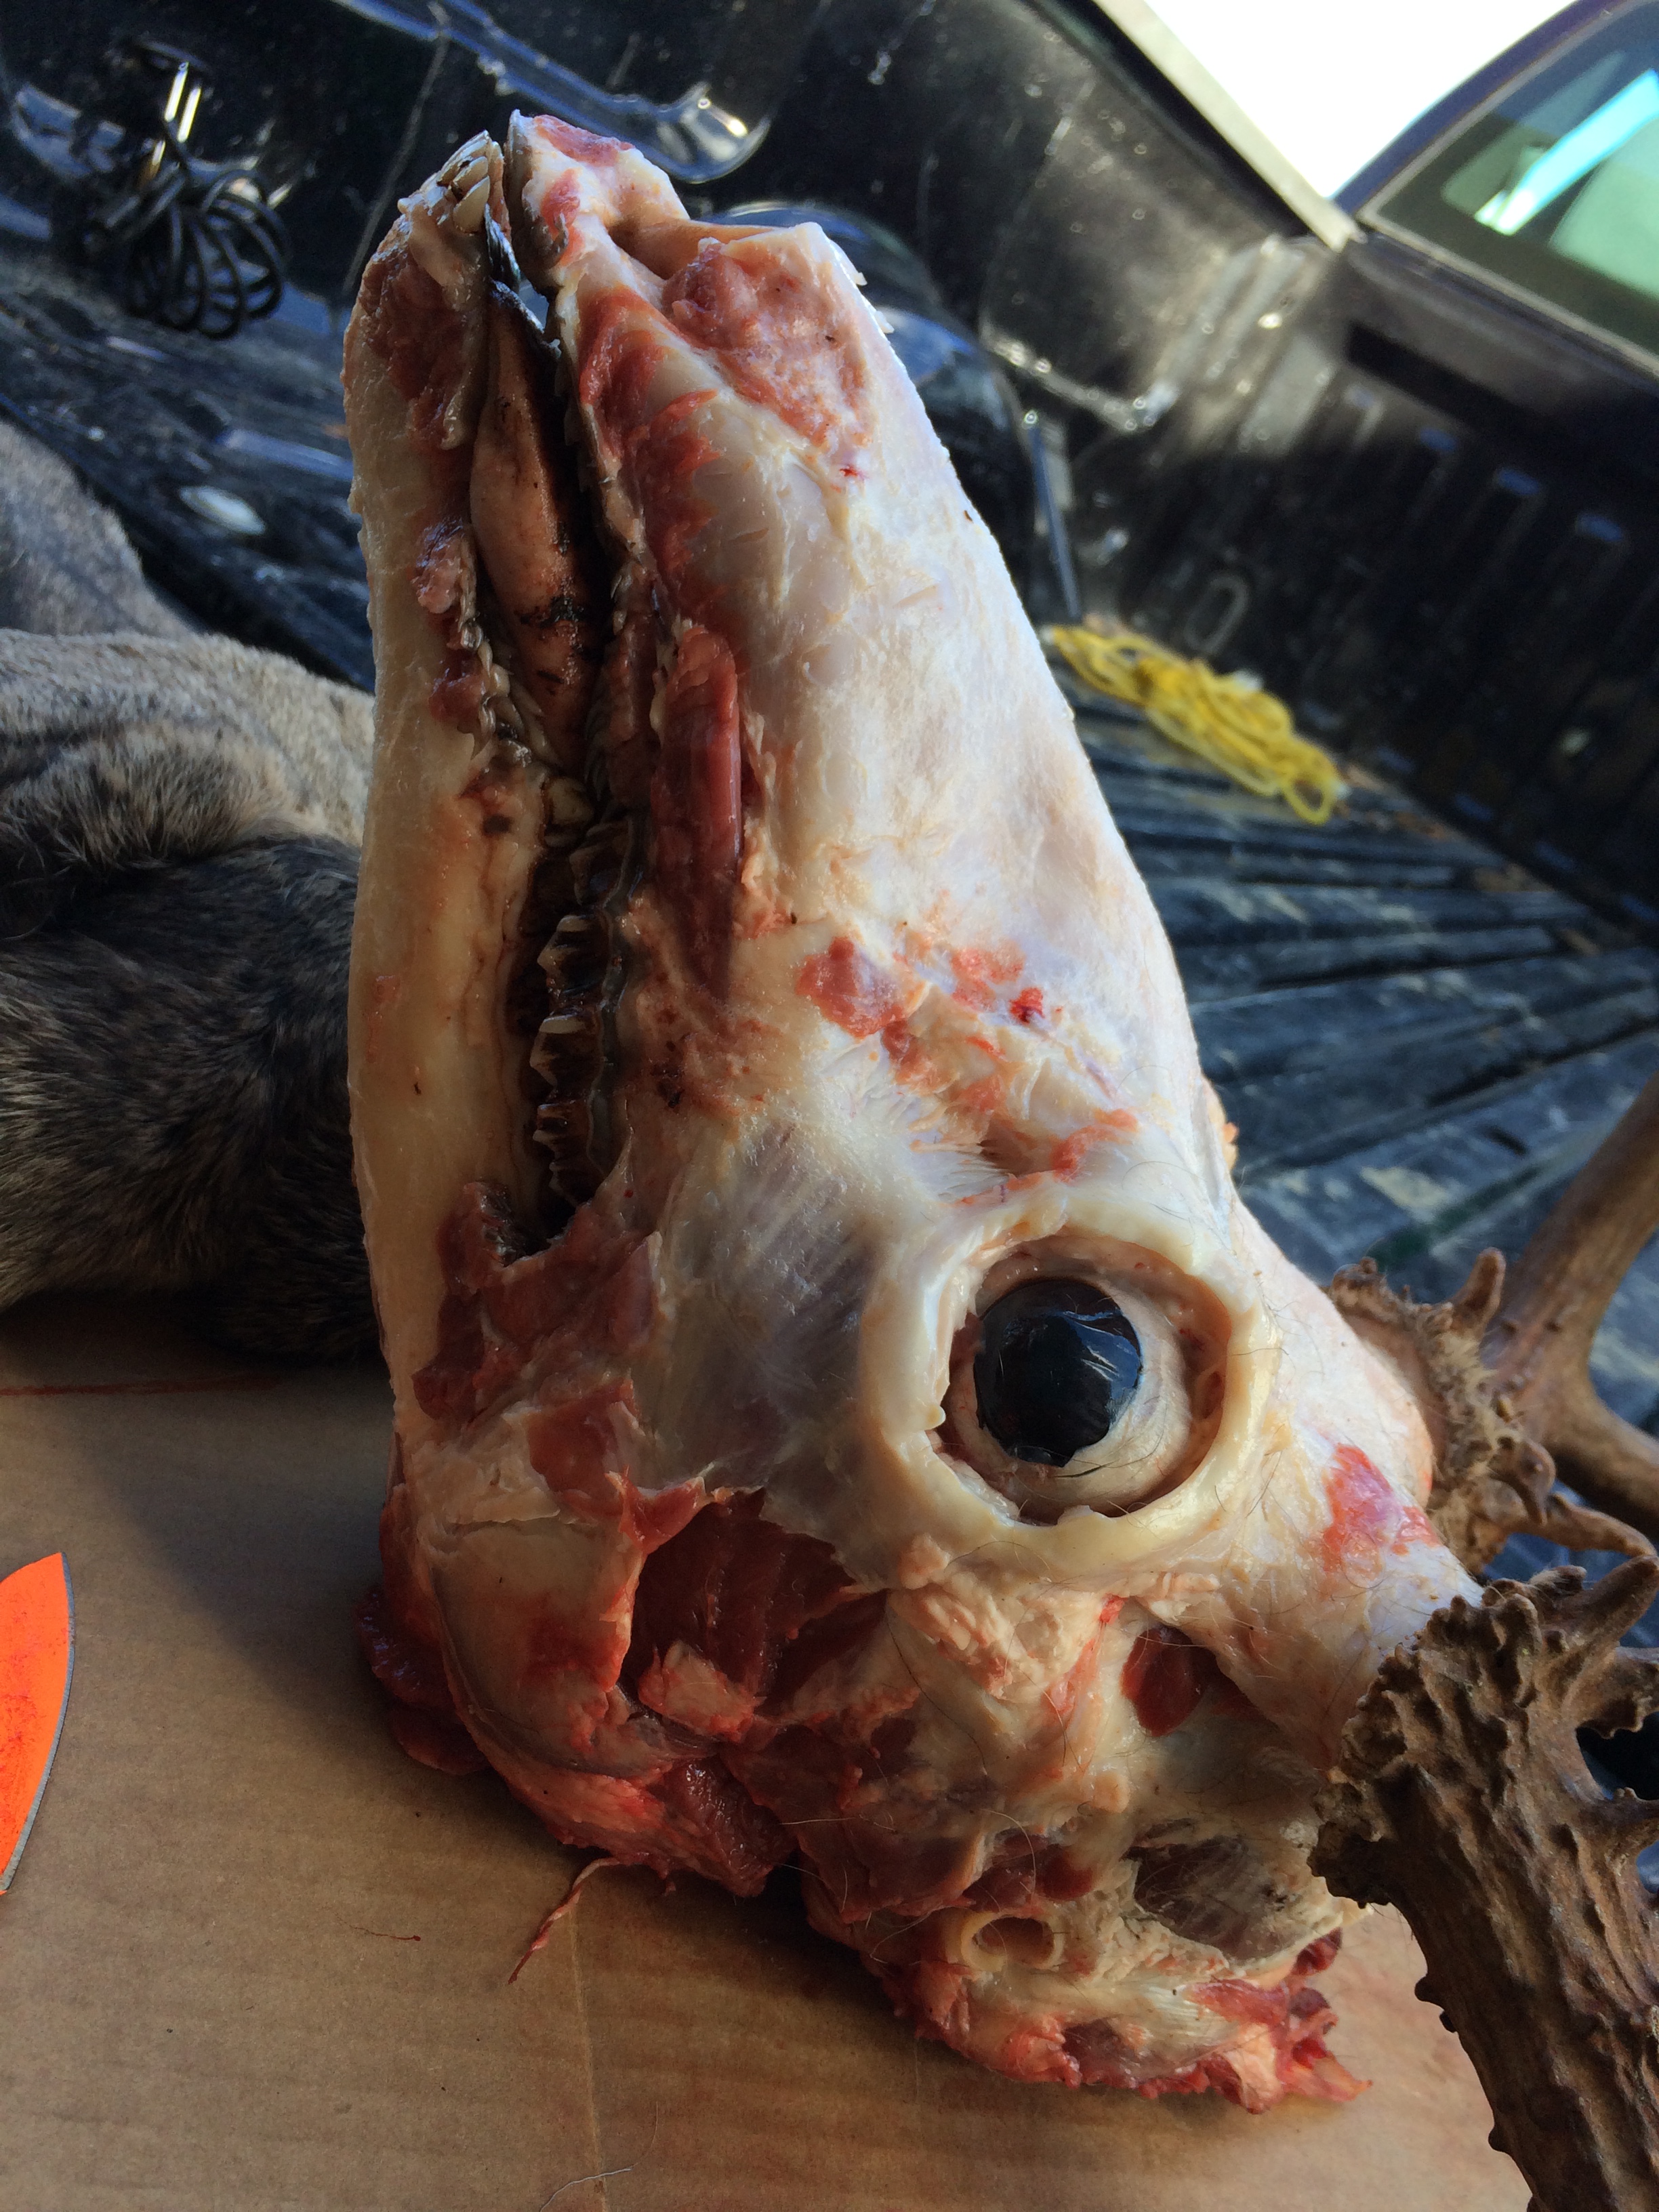
Skull Preparation:
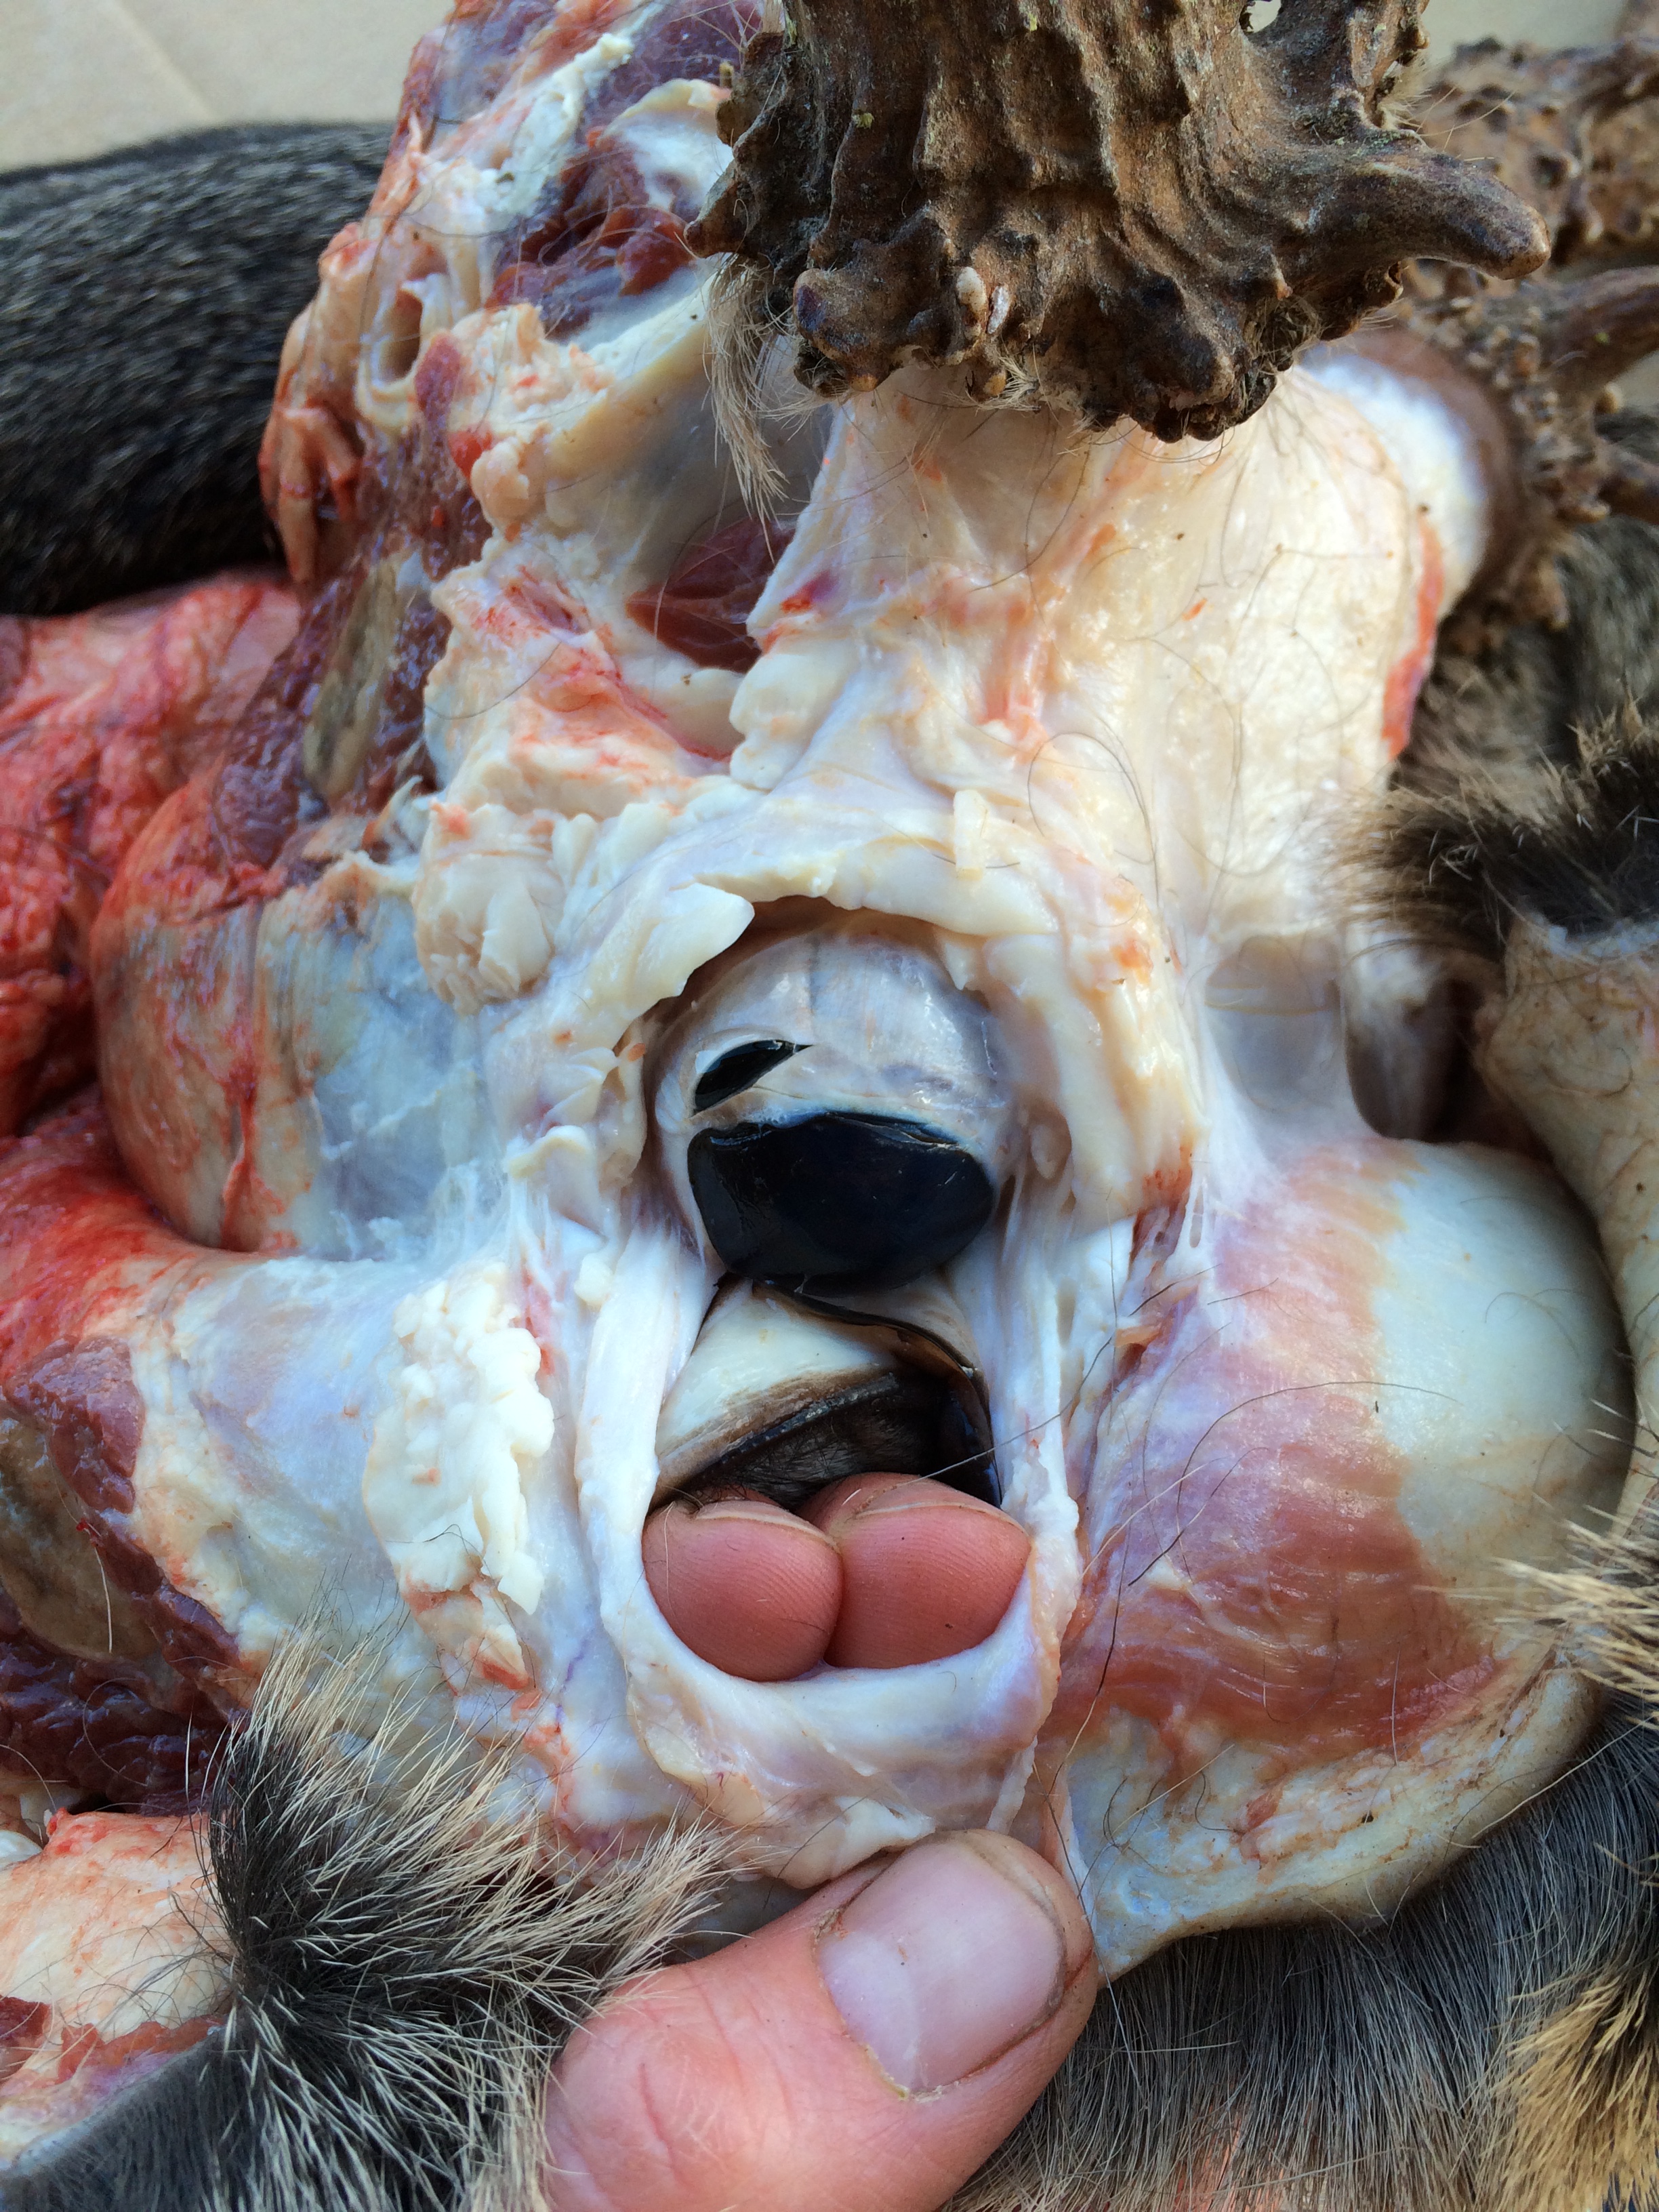
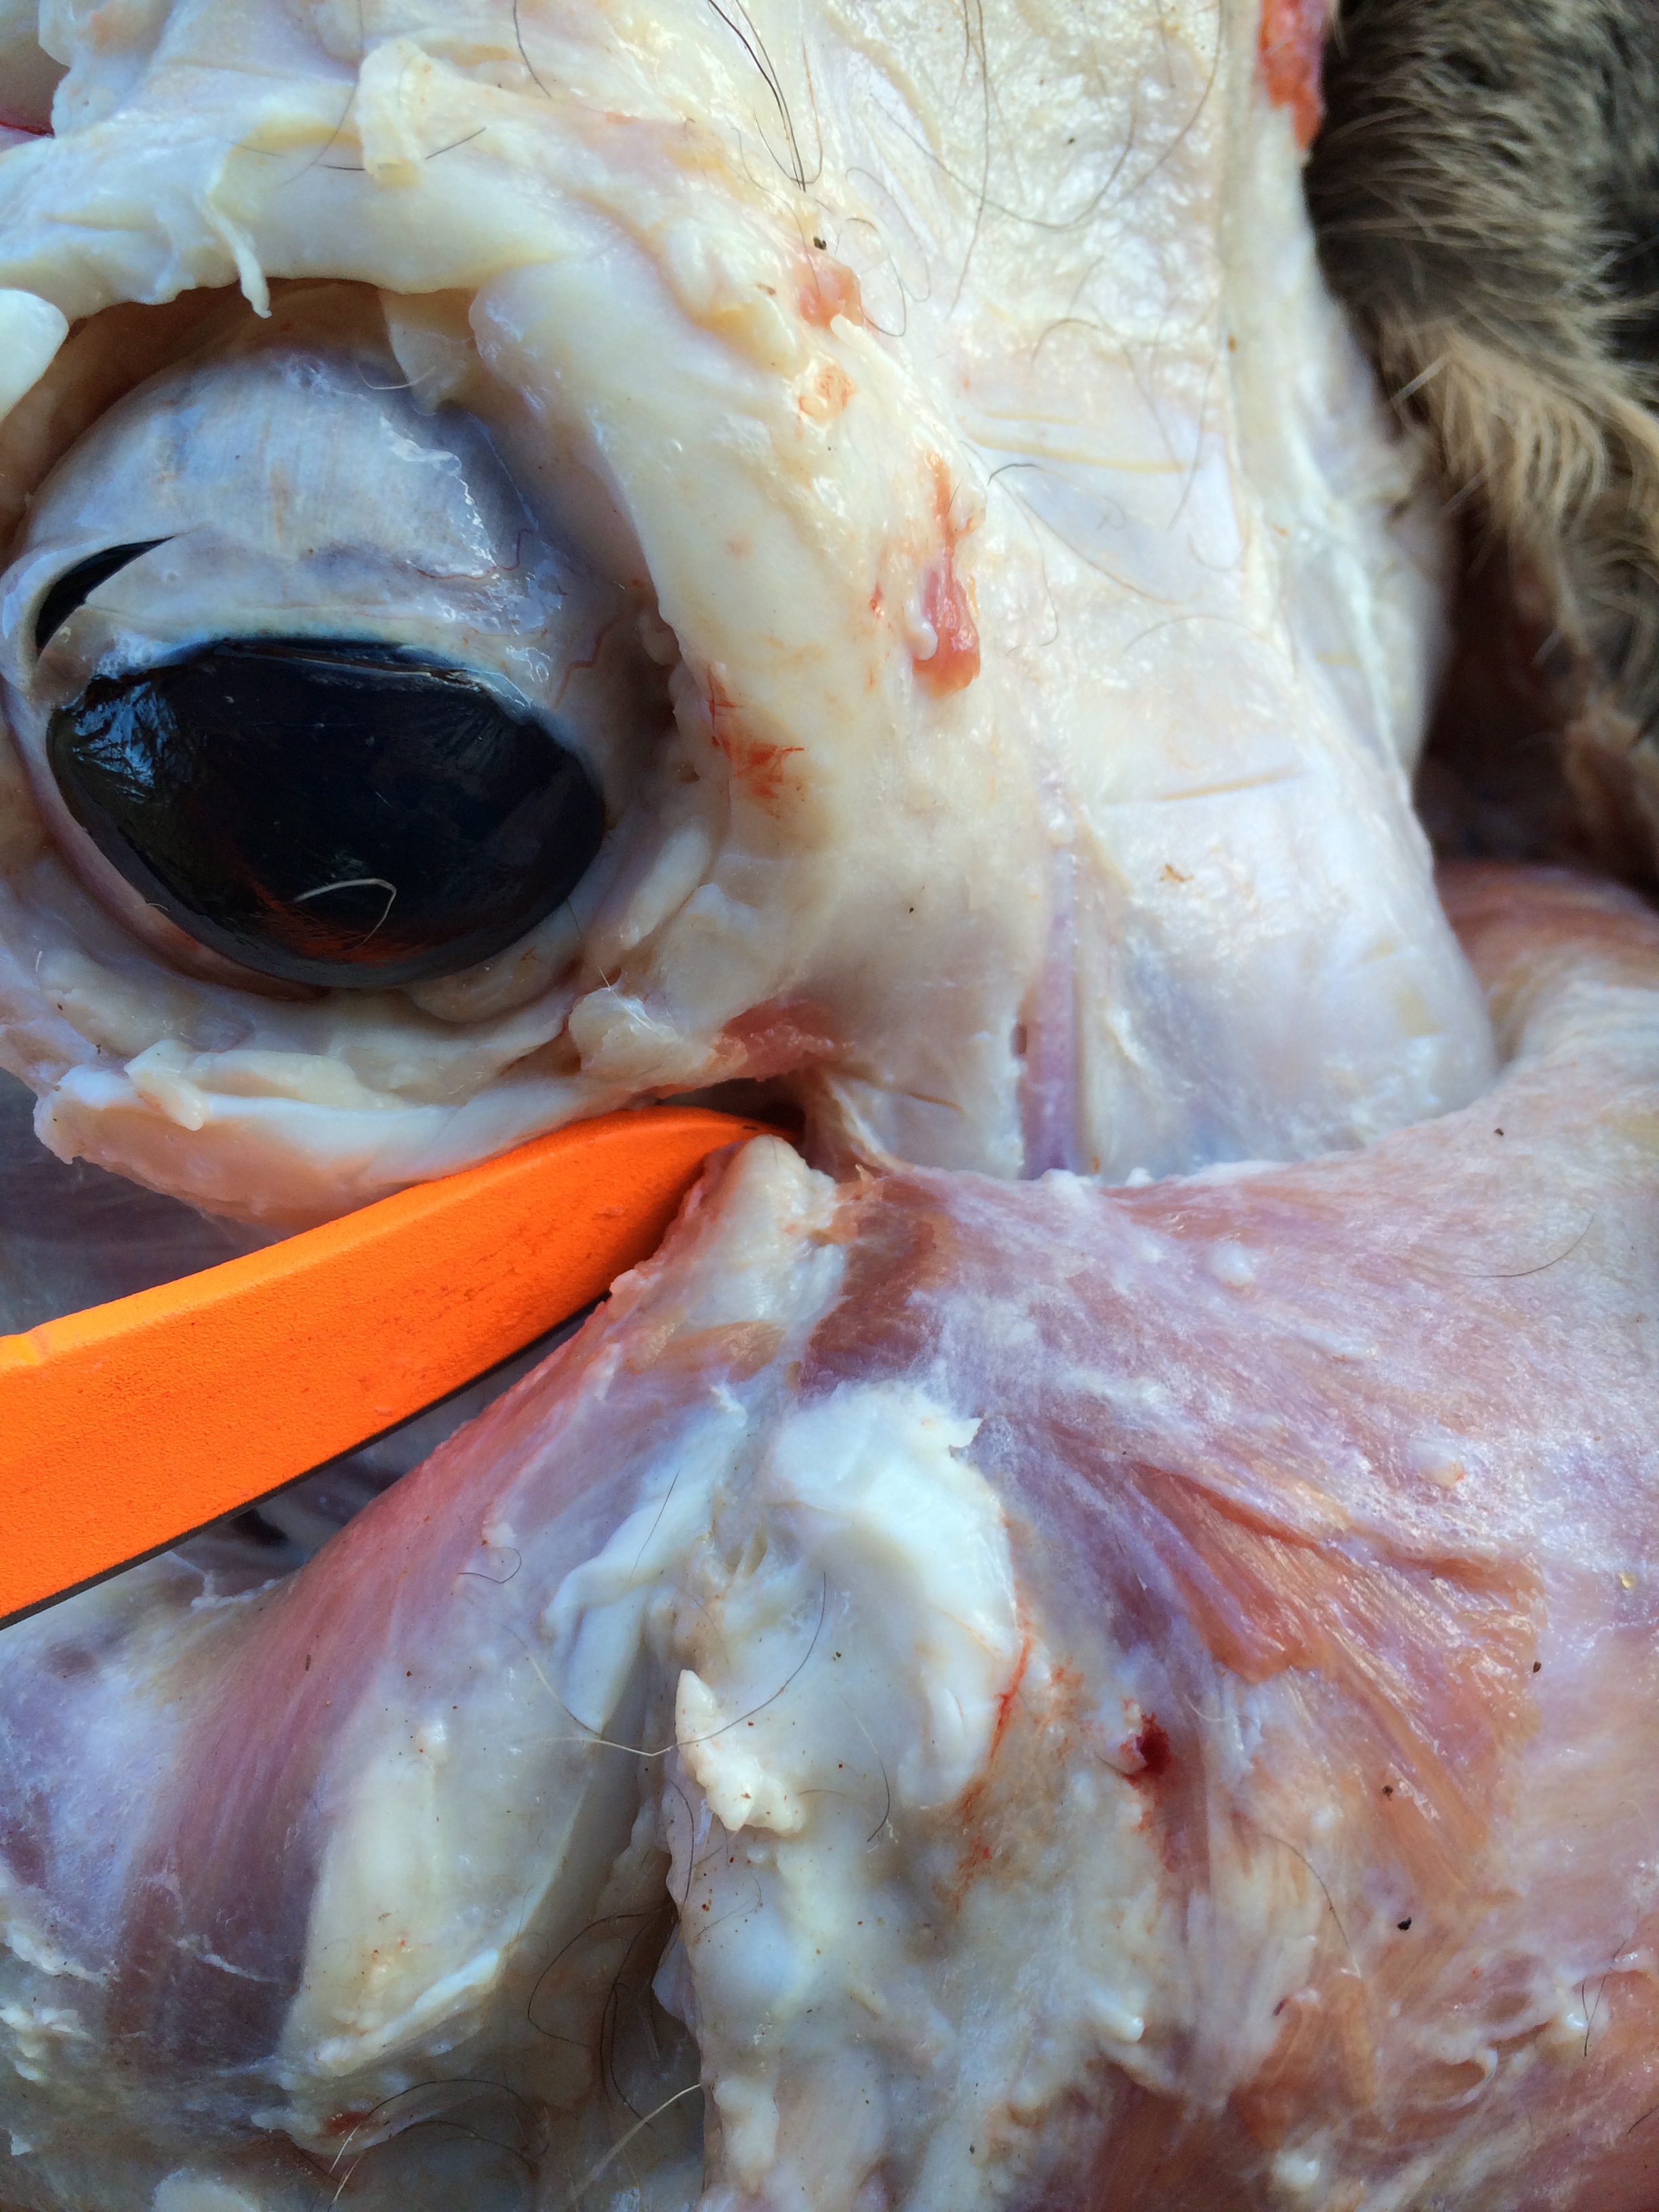
Skin head, trim excess meat, cut out the eyes, and
use an old kitchen knife (deer or elk sized animal) to “scoop” out as much of the brain as possible. A stiff piece of wire with a bent "hook" on the end works well too. If
skull is too dry, or frozen, then soak in hot water until you can remove the
hide and cut away excess meat and tissue. If you need to cape the head, instead of roughly removing the hide, then refer to "caping" photos further down. When head is skinned and trimmed, then move onto one of the method-specific cleaning links shown above.


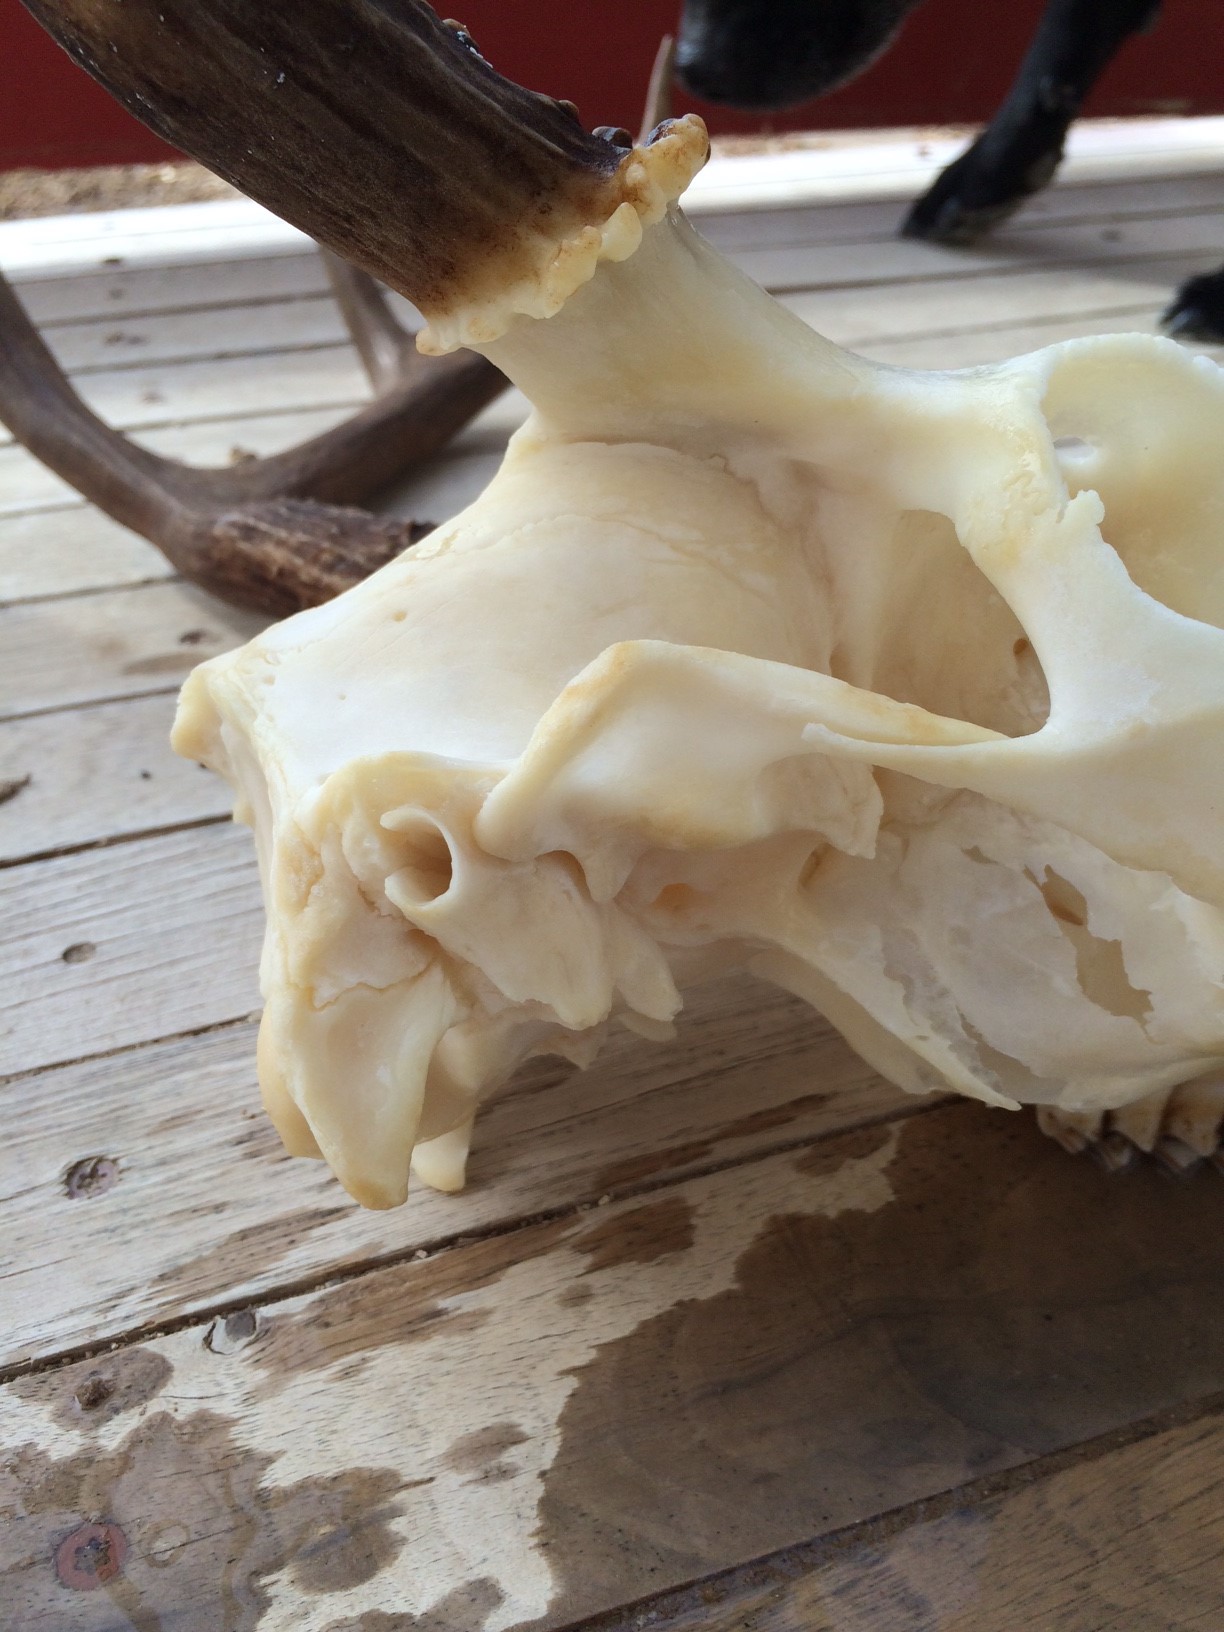
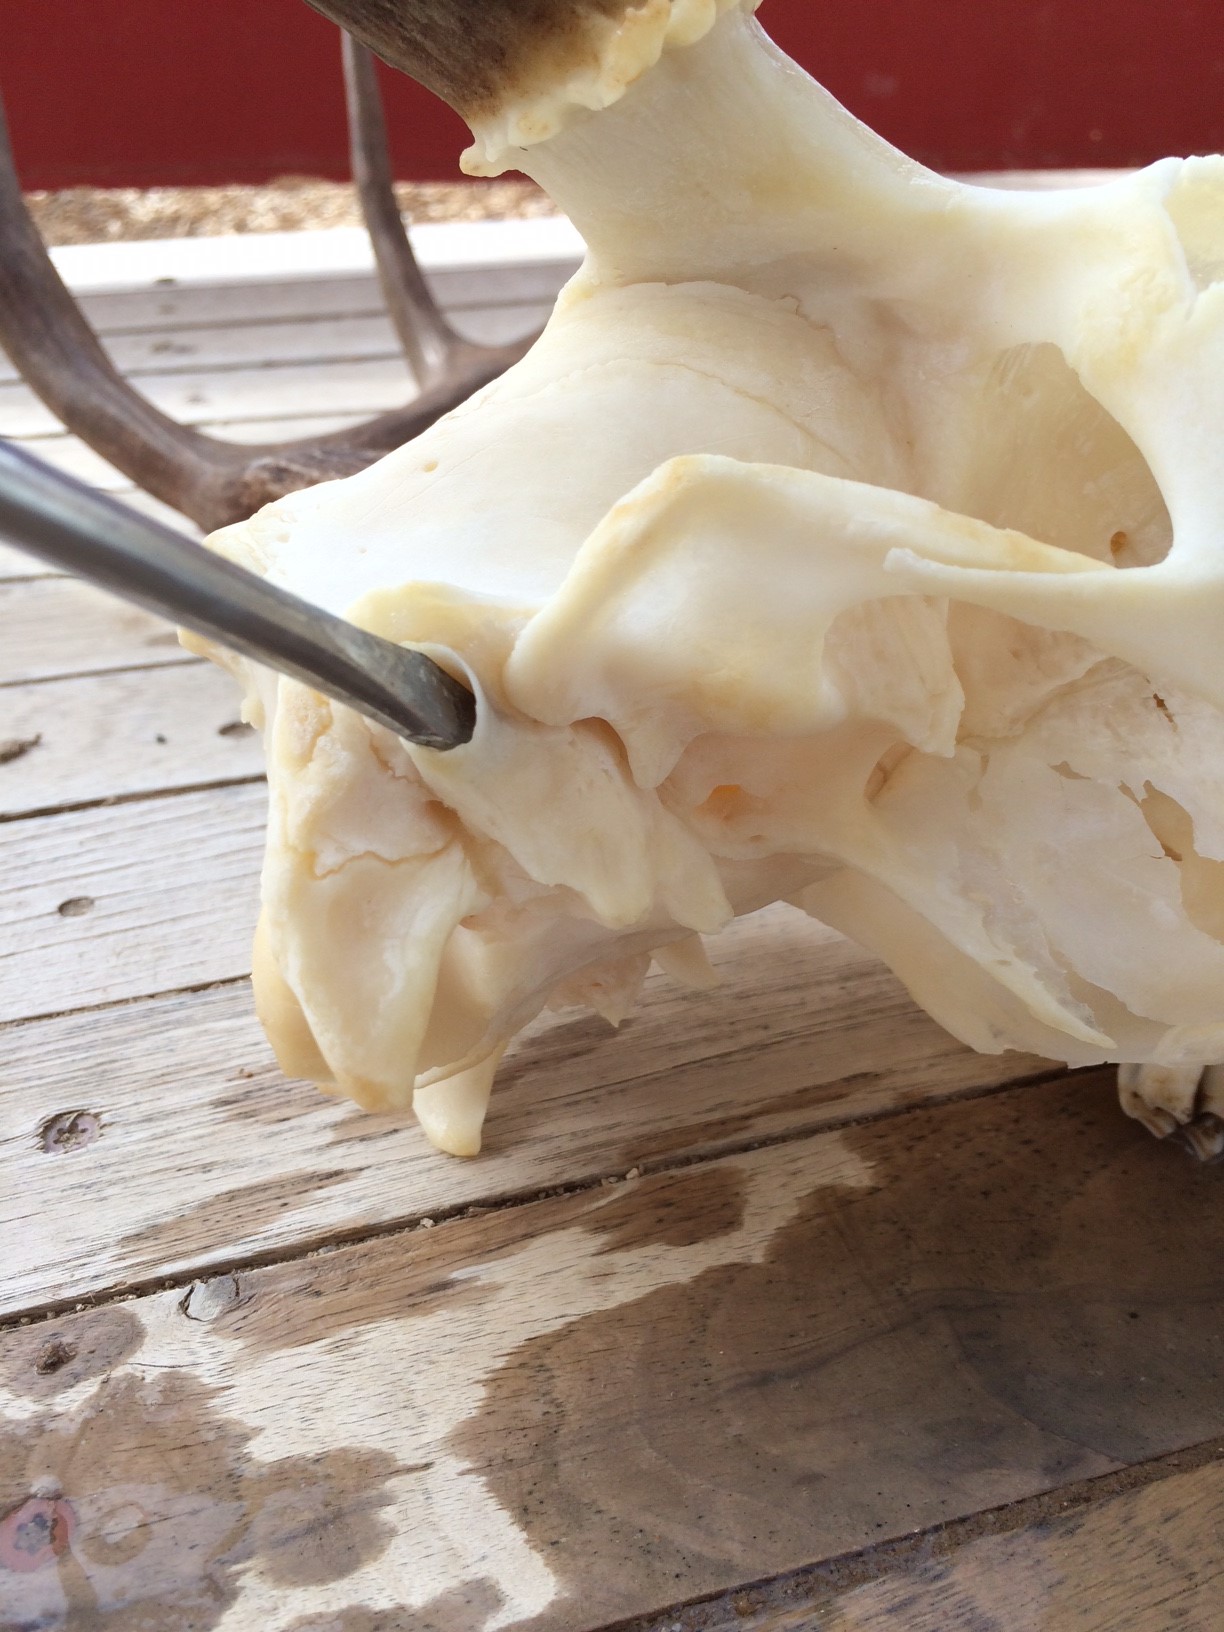
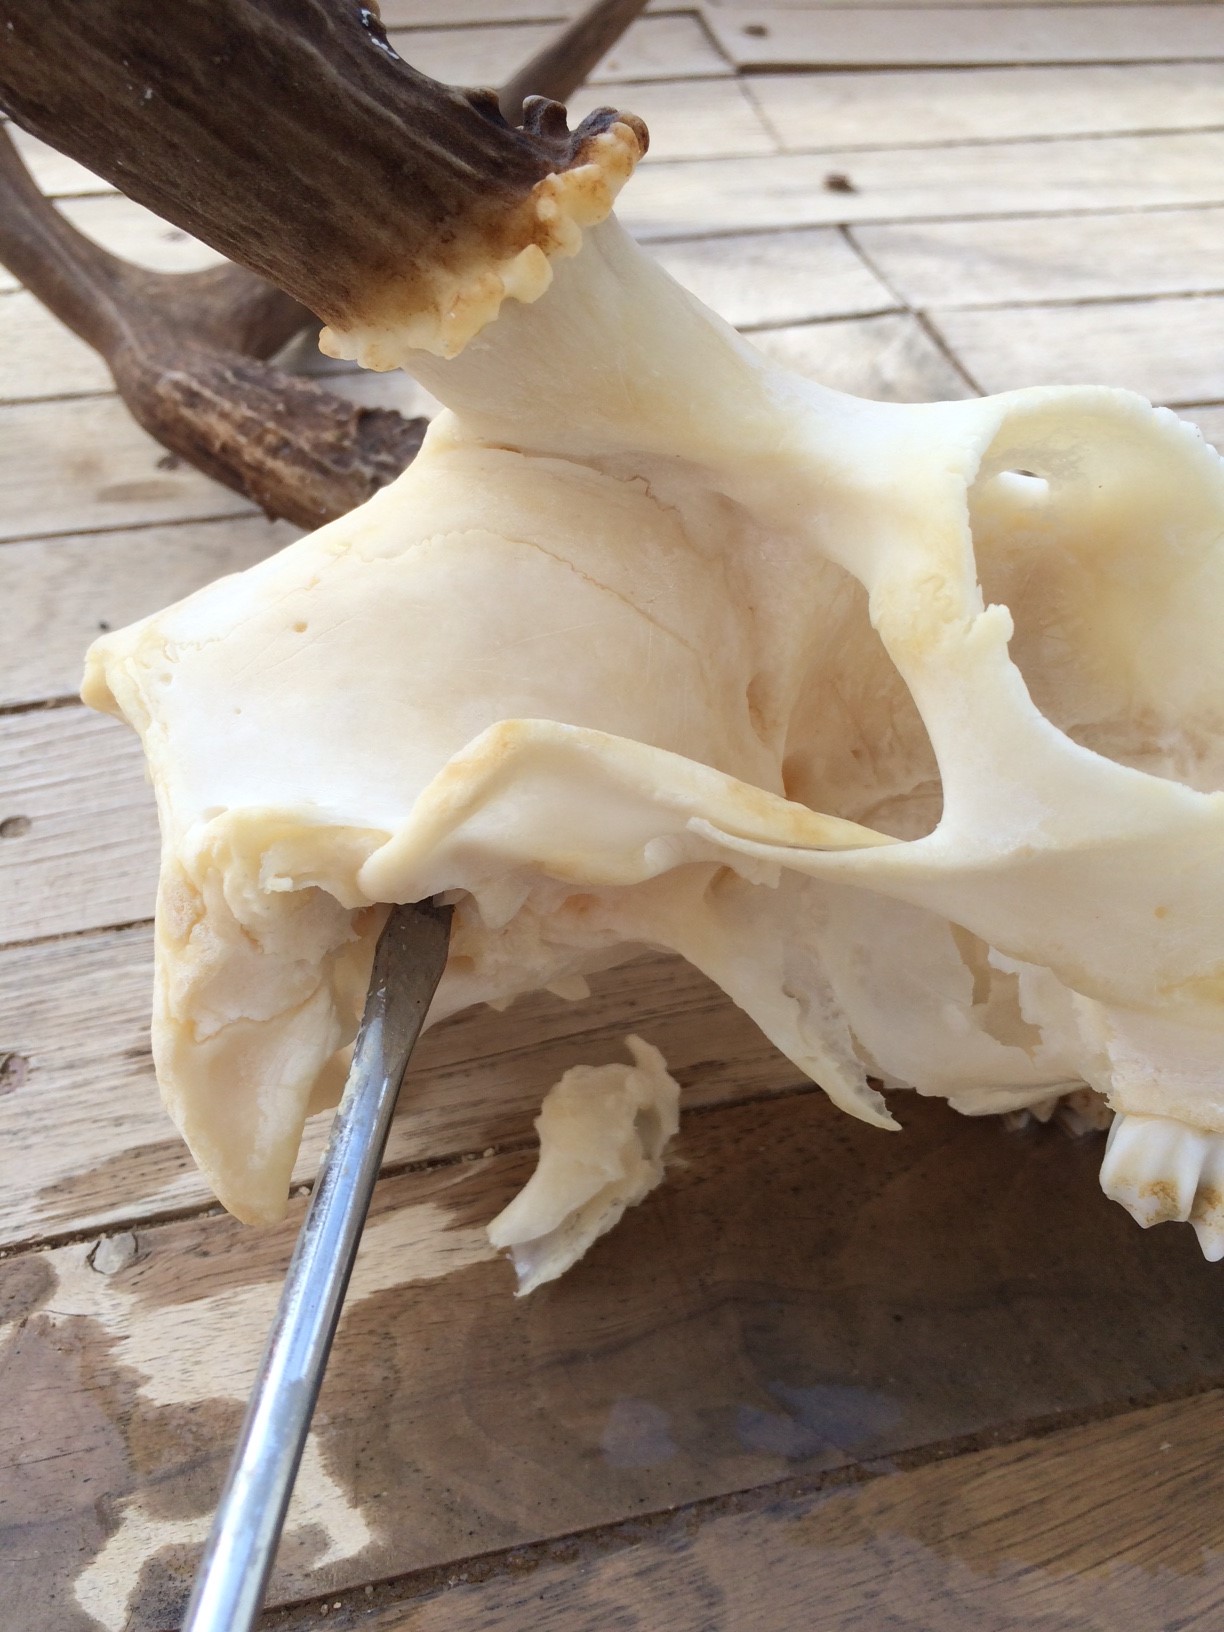
This can really help with cleaning off the stubborn tissue and grease under the base of the skull! Locate hole where ear canal is. After you've simmered, macerated, or after degreasing for a while, stick a screw driver or one side of a narrow pair of needle nose pliers into the hole. Leverage downward. It might come off in one piece, or you might need to break it out in several pieces.
Removing pronghorn sheaths (horns):
Get your pot to simmering temp, and then insert head with the horns submerged. After about 25 minutes, remove and with thick gloves, try to pull and twist inwards the sheaths off the cores. If they don't come off, simmer for another 15 minutes. Inserting a knife into the base of the sheaths can help pop them off by removing the "vacuum like seal" that the inner tissues create. After I pull a sheath off, I pack it full of borax. It helps dry it out, and bug proof any tissues left on the inside of the horn because borax is a natural pesticide (granted, it isn't a very strong pesticide).
Taxidermy.net tutorial link for removing the sheaths.
Remove sheaths using microwave?! Mentioned on a post on taxidermy.net. Proceed with caution so you don't get kicked out of house or ruin sheaths.
Drilling out the Cores:
Once the sheaths are off, saw the top 1/3 of the core off, and drill a couple holes down into the cores. This will really help the grease come out of this area of the skull (there is a ton of it). Instead of cutting the core, some people just drill horizontal and angled holes. I doubt it gets as much grease out though.

Modifications for velvet antlers:
Don't handle them, and get them to a freezer!
Freeze Dry: Freeze and get to the taxidermist!
Artificial: Strip velvet, clean, buy flocking spray, or get to the taxidermist!
Preserve: Various methods exist with varying success, but when I shot my velvet buck, I froze the head, and ordered velvet preserve and syringes. Then I caped, cut the skull cap, and proceeded to follow the directions. My velvet was too far along for it to work well, and I eventually also soaked it in borax water to bug proof it. But it still stunk for about 6 months, so it stayed in the garage until it didn't smell. Glued the skull cap onto cleaned skull. Used wire-wheel to clean skull cap.
Pressure Spraying (with 1000+ psi sprayer)
The verdict is still out on this for me and other reputable taxidermists. However, I have used this on a deer and two elk (one is on the front page of this site) that were almost beyond hope, and they turned out really well.
Carhartts, rubber boots, junk clothes, rain gear, and/or goggles may be useful....after one blowback of brain material in your face, you'll understand. I usually have to use my feet to hold the skull in place.
I lay out a piece of old plywood for a base. Don't spray too much on the antlers, the high psi can remove their coloration. Different sprayers have different strengths, and the strongest can nearly eat a hole through a skull. Start further from the skull and then move closer as you see how your sprayer works. Various spray patterns can help with different spots on the skull too. Be careful about blowing out the teeth and losing them. The last sprayer I used wasn't strong enough to damage the skull, so I used it up close and on full power. The nasals and sinus cavities can be damaged even with low PSI, so err on the side of caution when spraying them. If you don't care, then you can just blast them out along with the other tissues. I've only done this with skulls that had been in a heat tank, but I've seen YouTube videos of guys doing it with raw skulls with success.
I hope to experiment with this more in the future. I'd like to skip the simmer process by power spraying a raw skull, and then go into the heat tank from there. It would be faster, smell better, bake less grease into the skull, and much handier for large skulls like elk!
October 2016 Update:
I finally did it. I got my own pressure washer. It is a reconditioned Ryobi 1600 because it was cheap and high pressure. It might not have been the best buy, but that isn't the point of this update. The point is that I used it on my pronghorn buck with good results after simmering it until most stuff was loosened up on it, but tissue in nasals was not. I was even able to blast into the nasals without damaging them, and was able to blast away the stubborn tissue on the back of the skull. It took a solid 1/2 hour of spray work. My platform was a piece of plywood, with a 2x4 screwed down to it long side up. This helped me brace the skull from flying around.
Then I simmered my big buck deer until it was at the same status. Tissue all around skull had pulled back into clumps, and the nasals were softened up, but the tissue wasn't just sloughing off. Cook time was between 2 and 3 hours. Quite frankly, the results were amazing. Part of the reason was my simmer method, and my whitening process this time around. But I think I was able to simmer less time and avoid baking oil into skull. Additionally I could blast out the crannies. I suspect that the high power spray may have loosened up and removed some grease too. Regardless, I never want to mess with a skull again without the use of the pressure washer! My simmer method was dawn and about 1 or 2 tablespoons cheap dishwasher detergent powder. I did not change out the water like I usually have to. Although my skulls were pretty clean and brainless when I put them in the pot to start with. After pressure washing I soaked for a day using my "skull in a big ziplock of peroxide in a bucket of warm water" technique.
The flat jet nozzle works for most things, and is best for the nasals and sinuses so you don't blast them to smithereens. However, a spinning turbo nozzle is a "blast" to use because of how effective it is for those stubborn areas - like the back of the skull - or almost the whole skull in general! Even with a lower PSI machine like mine, the turbo can still remove color from the antlers and damage sinuses/nasals. Sometimes I switch back and forth between nozzles if I need to.


